How to create accessible table headers
This guide will help you create accessible tables in MS Word so users that rely on assistive technology including screen readers can access the Find case law service more easily.
Properly formatted table headers will enable these users to skip to the next column or row without having to listen to the entirety of the table and so get to the information they need quickly and efficiently.

Once you have created a table (Fig. A), follow these steps to improve the accessibility:
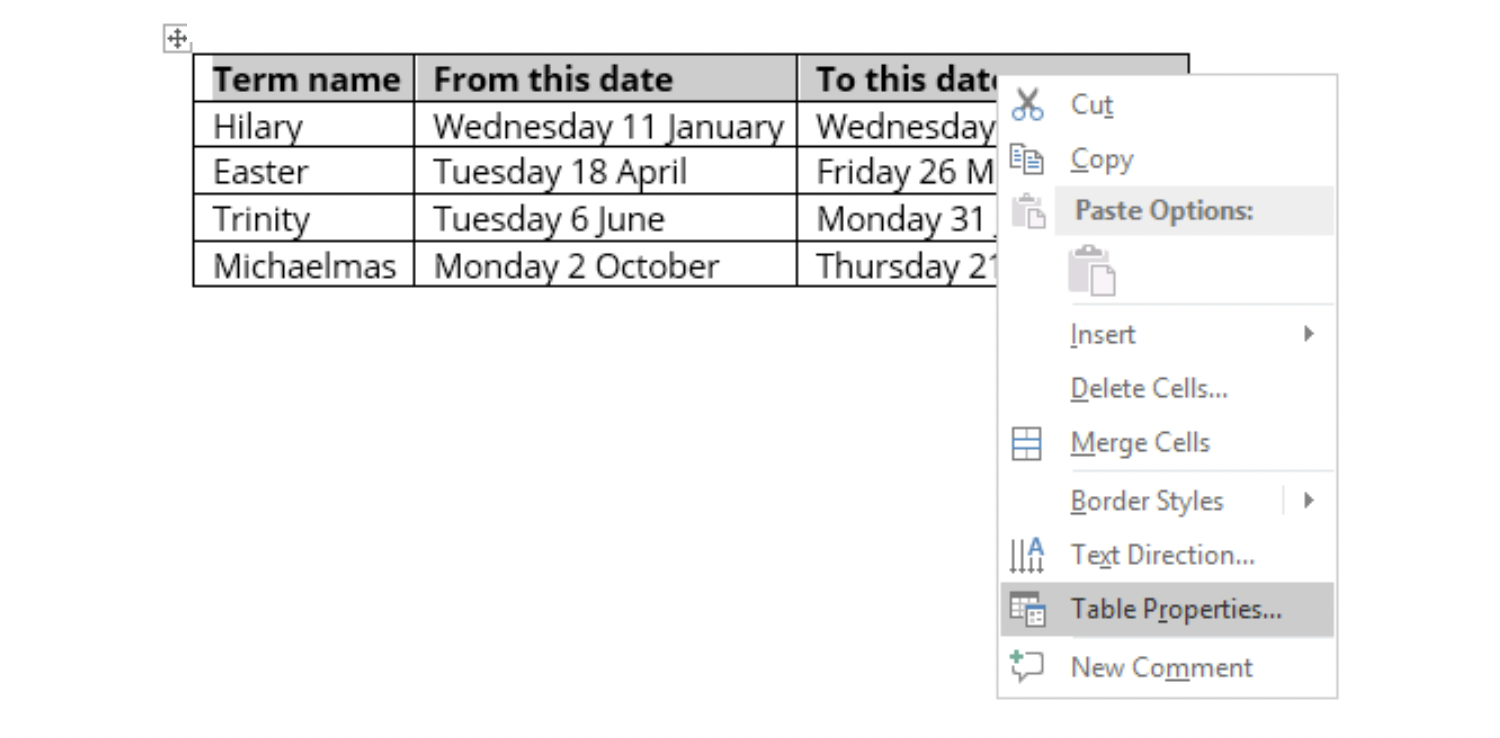
- Select all the table headers (this can be a columns or rows or both depending on the table. In this example we will select the top row. (Fig. B).
- With the table header(s) selected, right click to display the contextual menu. Now select Table Properties... from the menu. A new dialog panel will appear. (Fig. B).

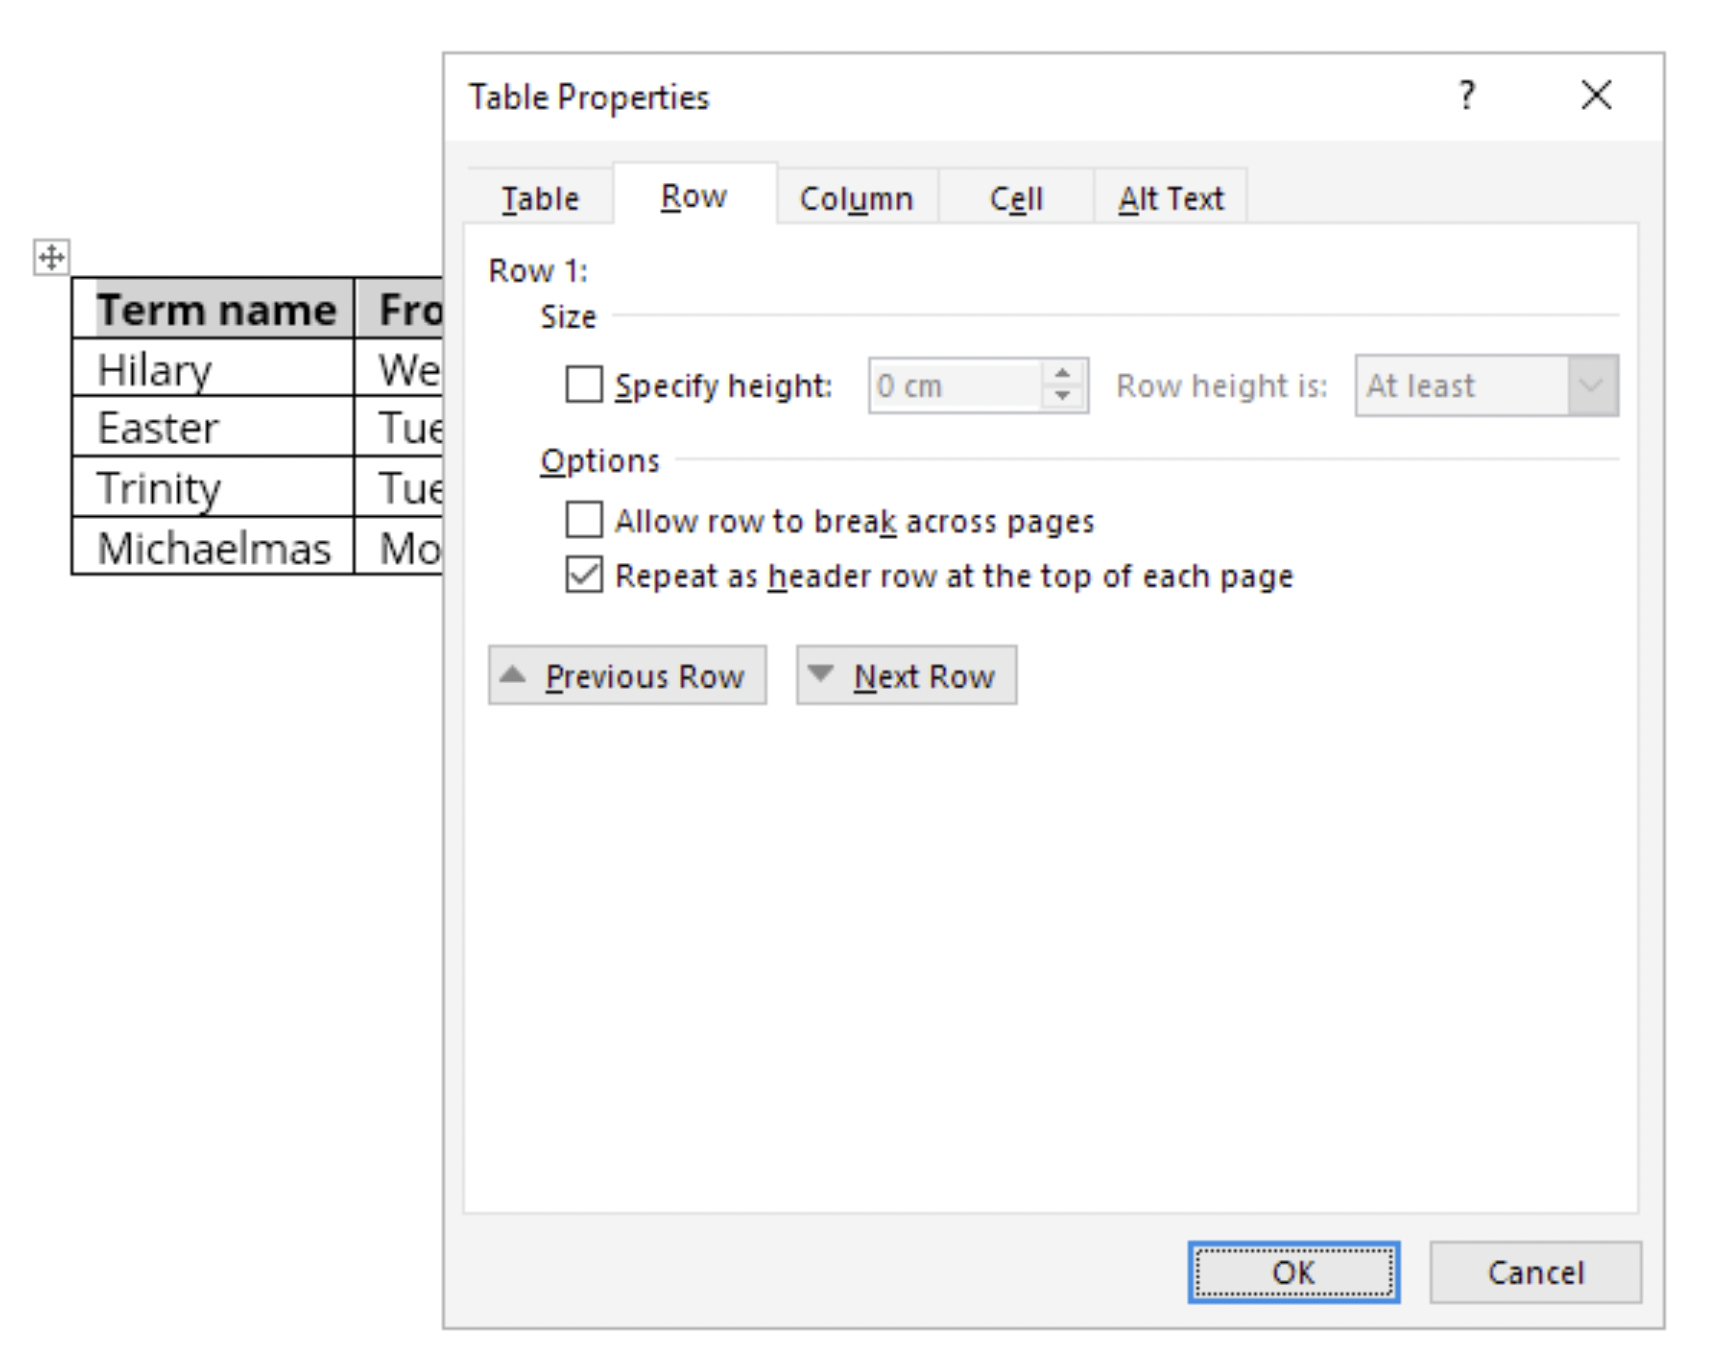
- In the Table Properties panel, select the Row tab at the top.
- On the Row tab there are two Options to make sure are set correctly.
- Make sure the property ‘Allow row to break across pages’ is unchecked. (Fig. C).
- The property ‘Repeat as header row at the top of each page’ must be checked. (Fig. C).
- Now select OK to add the table headers to the table.
- Repeat this process for any other table headers that appear on your table.

The table now allows users that rely on assistive technology to navigate around its content efficiently.
For help with the guidance on this page please email us at
judgments@nationalarchives.gov.uk
